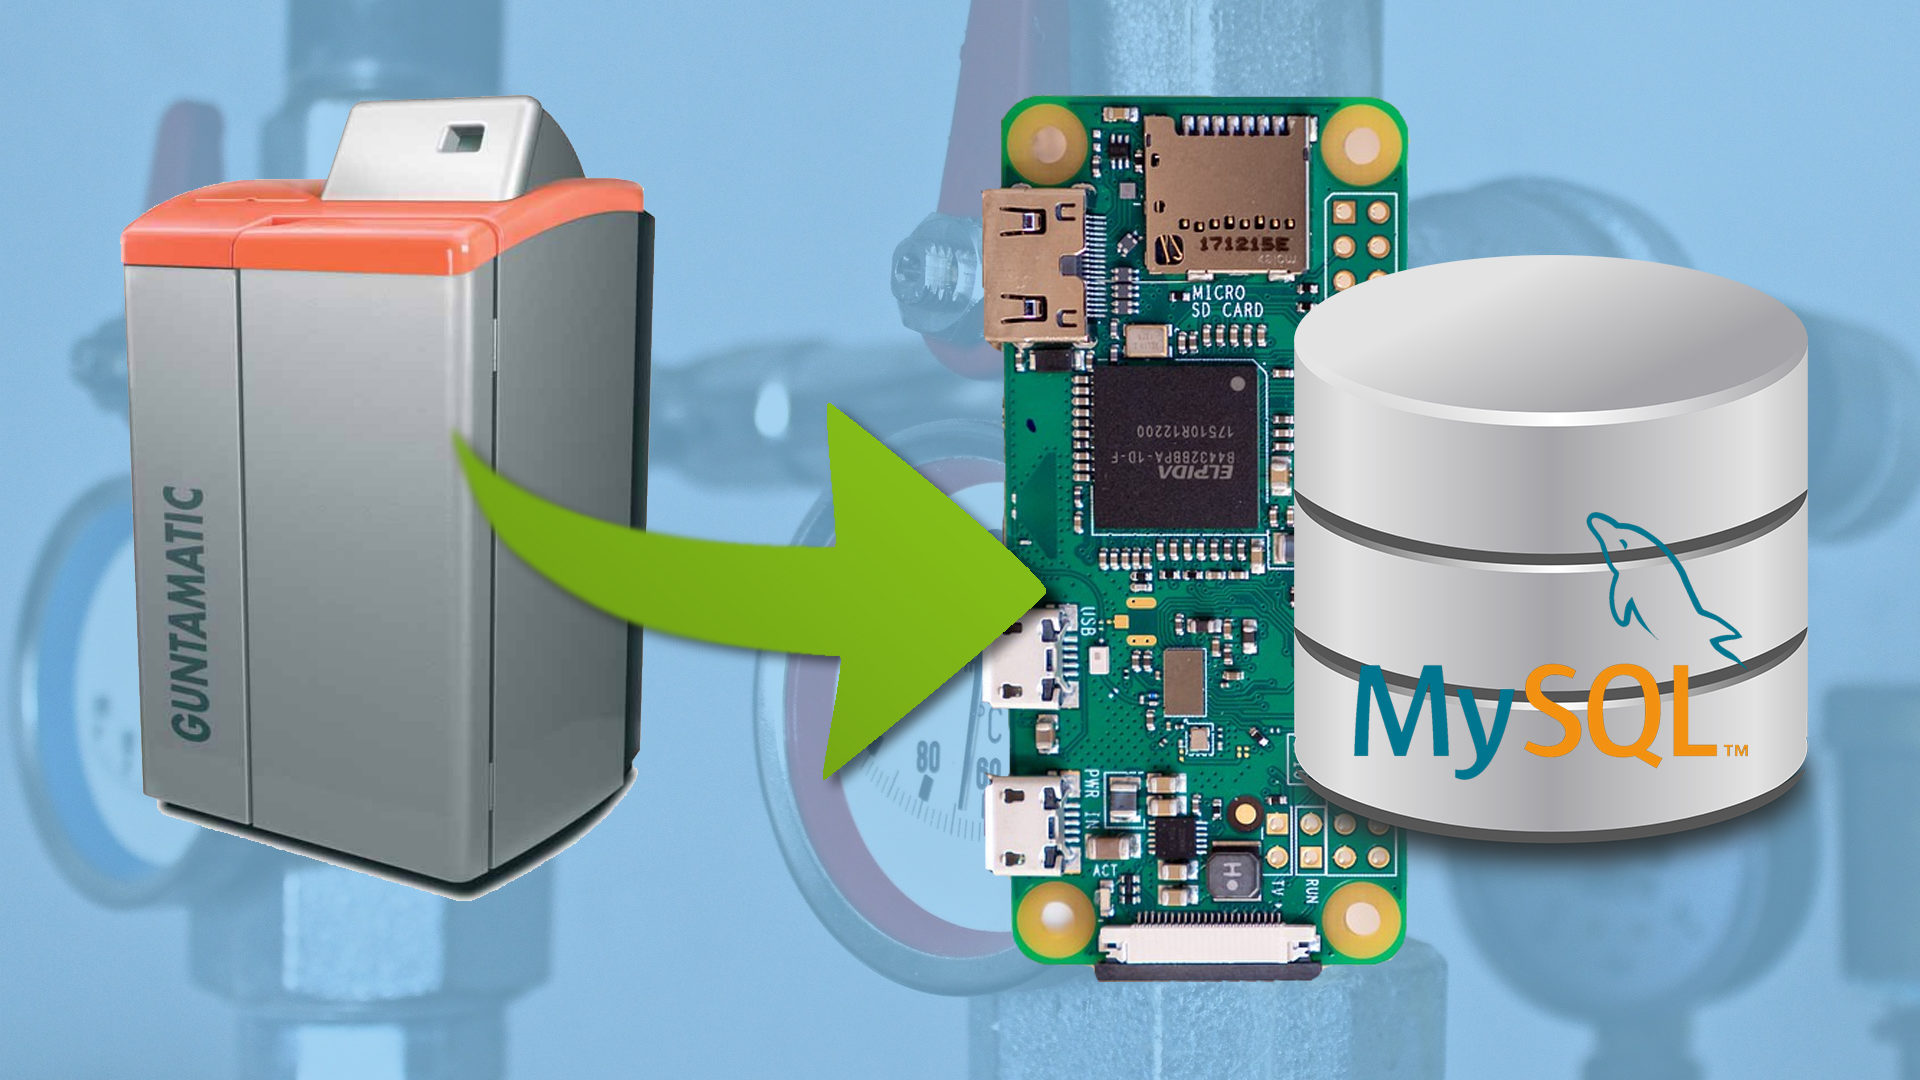
This project is part of a larger project to collect and visualize data from a heating system in my house. The heating system consists of several heating sources (wood, heat pump, solar system, and oil) and two large heating circuits (two buildings). In this post, I would like to present the possibility of how I read the operating data of the 14 years old GUNTAMATIC wood boiler via RS232 and store it on a Raspberry Pi in a MySQL database.
Problem description
Basically, the difficulty was to get the documentation of the RS232 interface. Which commands are needed to read out the data? Are special addresses necessary? The RS232 interface is an RJ45 socket – How does the pinning look like? Which configuration must the serial interface have? I would like to answer all these questions here.
Upon request to GUNTAMATIC, I have thankfully received some information. The most important point in advance: The wood boiler has different modes for the serial interface. On the one hand, there is a mode to connect a separately available GSM module, through which you can control the boiler via SMS. Unfortunately, the documentation of this communication between the GSM module and boiler is not available. So this mode is not useful for me.
But there is also a mode, in which the boiler regularly sends its operating data every 10 seconds simply as an ASCII encoded string with labels per value via the RS232 interface. This mode is activated by default, so I didn’t have to make any further settings on the boiler. This is of course very convenient so that I only have to include a parser in my software to read out the data. Although, of course, I would have liked to be able to control the boiler remotely 🙂
Now let’s look at the hardware I used.
Hardware
First of all, I use a Raspberry Pi Zero W, on which the program for reading the data and saving it in a database runs.
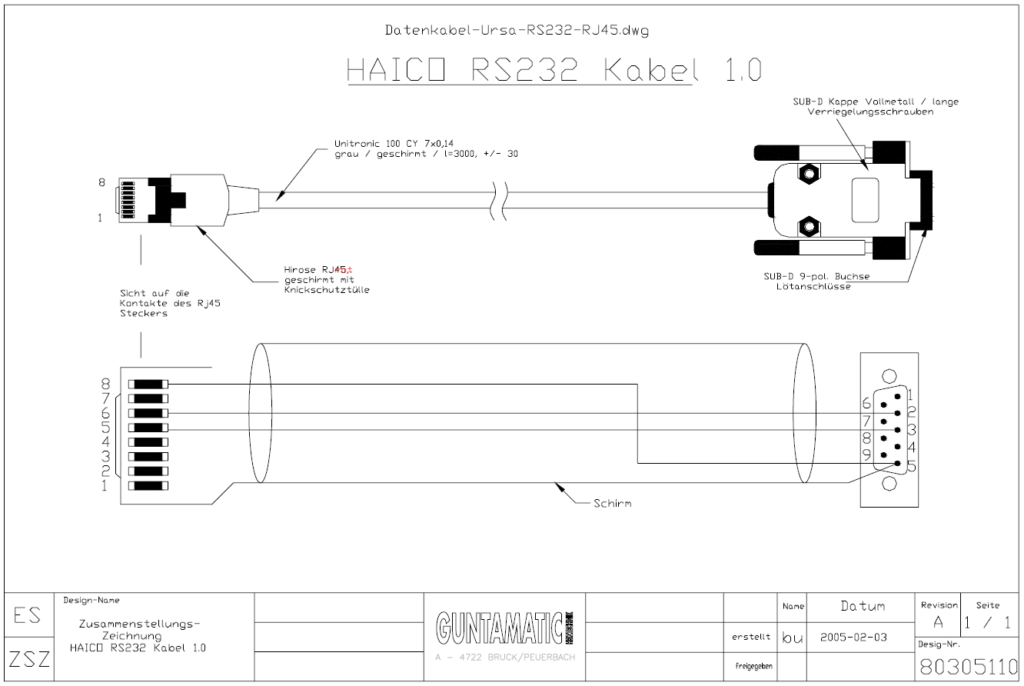
On the boiler, the serial port is an RJ45 socket, so a special cable is needed to map the lines to a standardized SUB-D 9-pin socket. In my setup, I only created a very short adapter cable with an RJ45 socket instead of an RJ45 plug, as shown in the drawing below. This allows me to use a standard Ethernet patch cable to connect the GUNTAMATIC boiler to the Raspberry Pi a few meters away.
The concrete pinning between RJ45 and SUB-D-9 is shown in the following table and in the drawing of GUNTAMATIC, only three wires are needed:
| RJ45 pin | SUB-D-9 pin | description |
| 8 | 5 | GND |
| 6 | 2 | RX |
| 5 | 3 | TX |
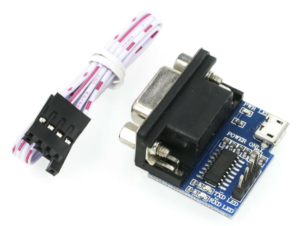
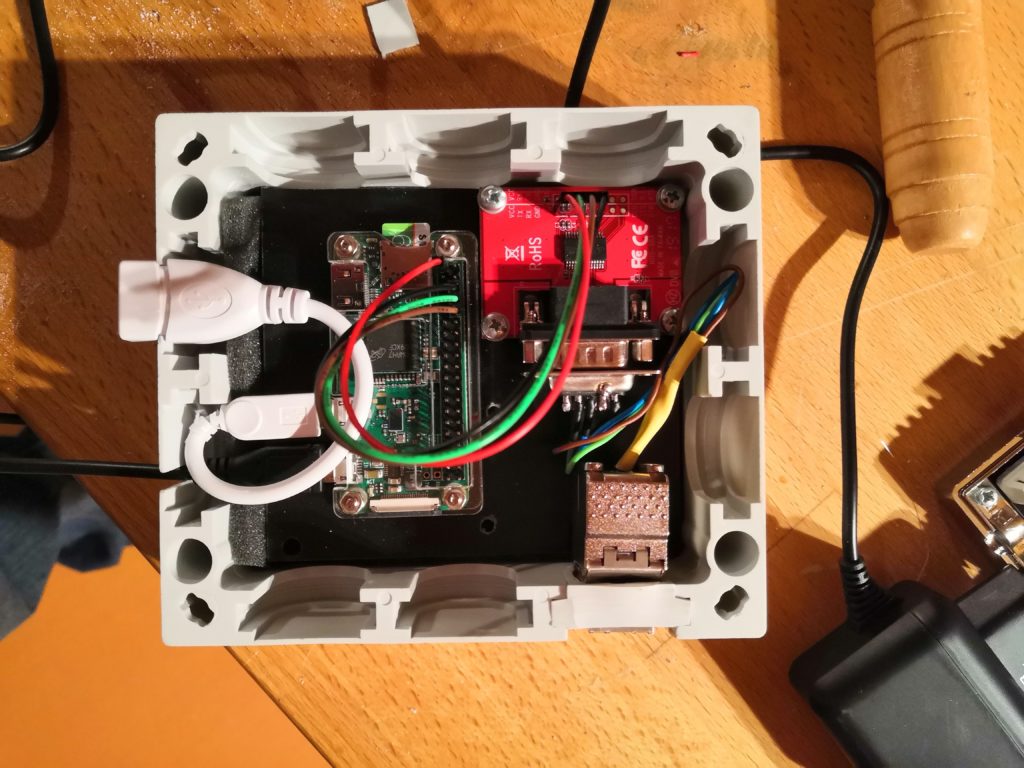
To be able to read the serial RS232 ports with the Raspberry Pi you need an additional RS232 Serial Port to TTL Digital Converter Module (for example this one: https://www.ebay.de/itm/281353512577). I connected the module to the RX/TX pins of the Raspberry Pi so that I can read from this serial port via a python script.
Software
In this paragraph, we will take a look at the python script. For the software part, I use a simple Python script, as this is very easy to implement and perfect for such a small task.
Foremost, you have to activate the serial interface of the Raspberry Pi. To do this, open the Raspberry Pi configuration in the terminal via
raspi-config and activate the serial interface under Interfaces -> Serial.
Now we can start with the code, first, we have to configure the serial interface as follows:
| Name | Setting |
| Baudrate | 19200 |
| Parity | NONE |
| Stop Bits | 1 |
| Data Bits | 8 |
| Flow Control | NONE |
This takes place directly in the Python script with the following lines:
import serial

# configure serial port
ser = serial.Serial(
     port='/dev/ttyS0',
     baudrate = 19200,
     parity=serial.PARITY_NONE,
     stopbits=serial.STOPBITS_ONE,
     bytesize=serial.EIGHTBITS,
     timeout=1
)
Now let’s briefly look at the format of the boiler outputs. As mentioned above, the boiler sends all operating data including their labels in human readable form via the serial interface. Here I have shown an example of a message:

You can clearly see that this message actually consists of two parts, each with date and time, a line with labels, and a line with the values. In addition, there are a few blank lines and lines with only hyphens.
In order to be able to write these values into a database, this long string must first be broken down and the numerical values extracted -> the so-called parsing.
I decided to read the serial data line by line from the serial port and pass the resulting string to a function handle_line(…). This function should take care of extracting the values correctly:
while 1:
	# read line from serial port
	x = ser.readline()
	# convert line to bytearray
	x_barray = bytearray(x)
	# remove the character 'ü' -> avoid problems
	for i in range(len(x_barray)):
		if x_barray[i] == 0xfc:
			x_barray[i] = 0x00
	# decode bytearray as UTF-8 string
	x_str = x_barray.decode('UTF-8')
	# parse line to extract values
	handle_line(x_str)
Parsing
The first step is to reference some global variables to store the result of the parsing. And discard all blank lines, dashed lines, and lines with the date as they are not relevant for parsing:
def handle_line(line):
     global state, lbl1, lbl2, data1_str, data2_str, data1_received

     #discard any empty line and dotted lines
     if(len(line.strip()) < 5 \
          or line.strip().startswith("-----")\
               or line.strip().startswith('Datum')):
          return
Now there are only two types of lines. Either a line with the labels (=label line) or lines with the values (=data line). I used now a small state machine to find out to which label line a received data line belongs. There are four states for this:
- First a state “lbl1“, which also represents the initial state of the state machine. As soon as a new line arrives, it is only accepted if it is the first label line. This can be determined simply by comparing the first three characters of the line.
- If the first label line has been successfully recognized, the program switches to the “data1” state. By switching to this state, the parsing algorithm knows that the next received line is a data line and belongs to the first label line.
- After receiving the first data line, the state machine jumps to the state “lbl2” and thus waits for receiving the second label line.
- Similar to the first state, the state machine changes to state “data2” as soon as the second label line has been received. In the “data2” state, the second data line can now be read, and then writing to the database can be triggered using the write_to_db(…) function.
In the script the automat looks like this:
     if state == "lbl1":
          if line.strip().startswith('TKi'):
               state = "data1"
               lbl1 = line.split()
     elif state == "data1":
          #print("State data1")
          data1_str = line.split()
          state = "lbl2"
     elif state == "lbl2":
          #print("State lbl2")
          if line.strip().startswith('KLP'):
               state = "data2"
               lbl2 = line.split()
     elif state == "data2":
          #print("State data2")
          data2_str = line.split()
          #write data to database
          write_to_db(data1_str, data2_str)
          state = "lbl1"
Write to MySQL database
The last step is to write the data into the database. There are good tutorials online for installing a MySQL database on a Raspberry Pi, so I won’t go into that here. At the start of the script, you have to initialize a connector for the database. This is done with the following few lines:
import mysql.connector
import mysecrets

mydb = mysql.connector.connect(
  host="localhost",
  user=mysecrets.user,
  password=mysecrets.password,
  database=mysecrets.databasename
)
The login data for the database are stored in a separate file mysecrets.py as follows:
user = "mysql_username"
password = "******"
databasename = "mydatabase"
databasetable = "databasetablename"
After the initialization, we can assemble a SQL string from the data and send it to the database. This functionality I have implemented in the function write_to_db(…). The code for this looks like this:
def write_to_db(data1_str, data2_str):
     global mydb, columnnames_db

     mycursor = mydb.cursor()

     sql = "INSERT INTO " + mysecrets.databasetable + "("
     for i in range(len(columnnames_db)):
          if i > 0:
               sql += ","
          sql += columnnames_db[i]
     sql += ") VALUES (%s, %s, %s, %s, %s, %s, %s)"
     val = (data1_str[0], data1_str[1], data1_str[3], data1_str[8], data1_str[9], data1_str[10], data1_str[15])
     mycursor.execute(sql, val)

     mydb.commit()
I skipped some parts of the code in this post. As always, I published the complete code on GitHub: https://github.com/techniccontroller/HeiSO_guntamatic_reader
Finally, we can execute the program with
python guntamatic_serial_reader.pyBut even better would it be to execute the code as a service, so that it automatically start after reboot.
Execute as service
To execute the script as a service we need to create a file guntamatic_reader.service in /etc/systemd/system/ with the following content:
[Unit]
Description=Guntamatic Serial Reader service
After=network.target
StartLimitIntervalSec=0
[Service]
Type=simple
Restart=always
RestartSec=30
User=pi
ExecStart=/usr/bin/python3 /home/pi/guntamatic_reader/guntamatic_serial_reader.py

[Install]
WantedBy=multi-user.target
Make sure to adjust the path to your python script in the highlighted line. This service is configured to start after the network is set up after reboot. It will automatically restart after 30 seconds if it crashes.
To start the service run this line in the terminal:
sudo systemctl start guntamatic_reader.serviceAfter that, you should see that the data will be added to the database every 10 seconds (after every new message from the boiler).


3 Comments
Wira · 04/12/2023 at 12:08
Hello Edgar,.. I think I would try the cable as you suggested to me. Thanks for your advice..
wira · 03/12/2023 at 13:47
So if my device has serial port rs232 and I use raspberry pi 3b which has usb port on it, can I use serial to usb cable directly to read data from the device?
Techniccontroller · 03/12/2023 at 14:07
Hello wira,
thank you for your comment.
I am not sure what kind of cable you have. I think it needs to have some converter chipset inside to work with USB (like this one: https://www.reichelt.de/de/de/usb-2-0-konverter-a-stecker-auf-rs-232-1-5-m-usb2-seriell-p58641.html?r=1). Then it should work on the normal USB-Port of you Raspberry Pi 3b.
In my project, I used the RS232 Serial Port to TTL Digital Converter Module to use the RX/TX pins directly on the header of the Raspberry Pi. But if you can connect the RS232 port to your USB it should also work fine.
Best regards
Edgar