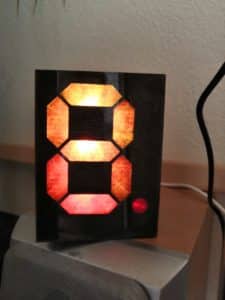
Here is one more small project I build on one weekend. the starting point was a spare “Raspberry Pi Blink!” mini LED strip originally planned for a Raspberry Pi.
I wanted to build at least a little bit useful project with these eight LEDs. A seven-segment display is therefore perfect fit. The idea is to light every segment with one LED. A 3D-printed light guide will help to separate the different light sources and map them to the shape of the seven-segment display. A semitransparent foil will act as a projection plane.
3D printed light guide
The challenge for the light guide was to map those eight narrow aligned LEDs to the single segments of a 7-segment digit without overlapping the single lightpaths. I constructed the light guide with Autodesk Fusion 360. The final light guide looks like this:
(Turn the 3D object with your mouse/finger)
After printing, I coloured the inside of the light guide with some silver colour so that the light of the LEDs can be better reflected.
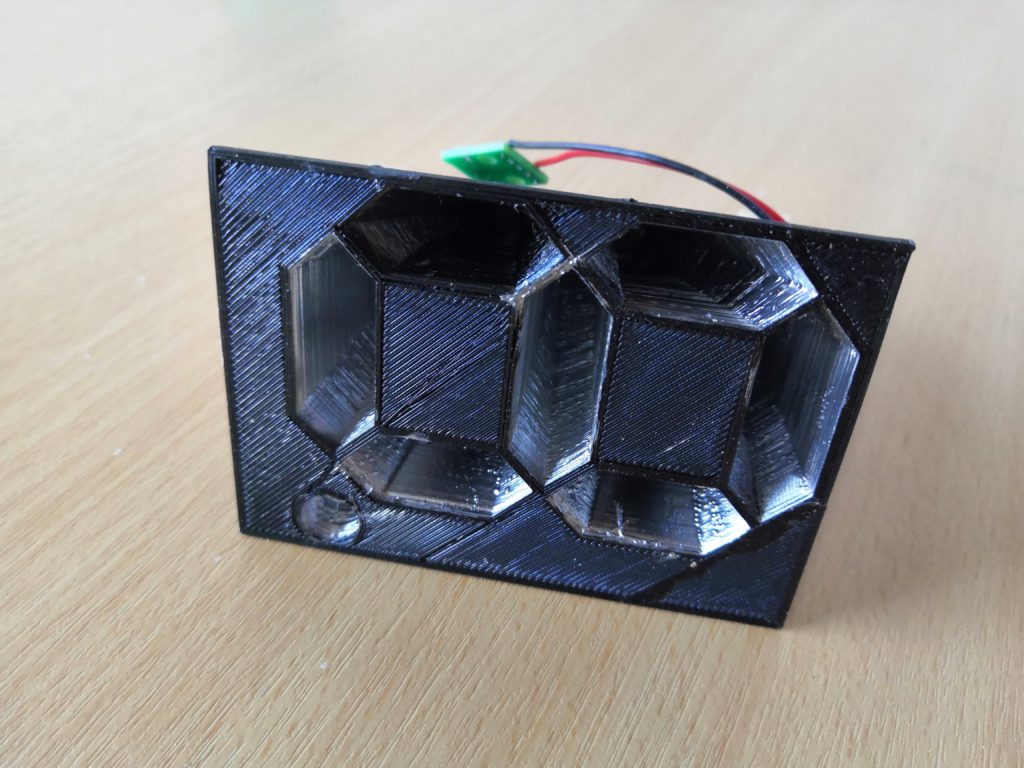
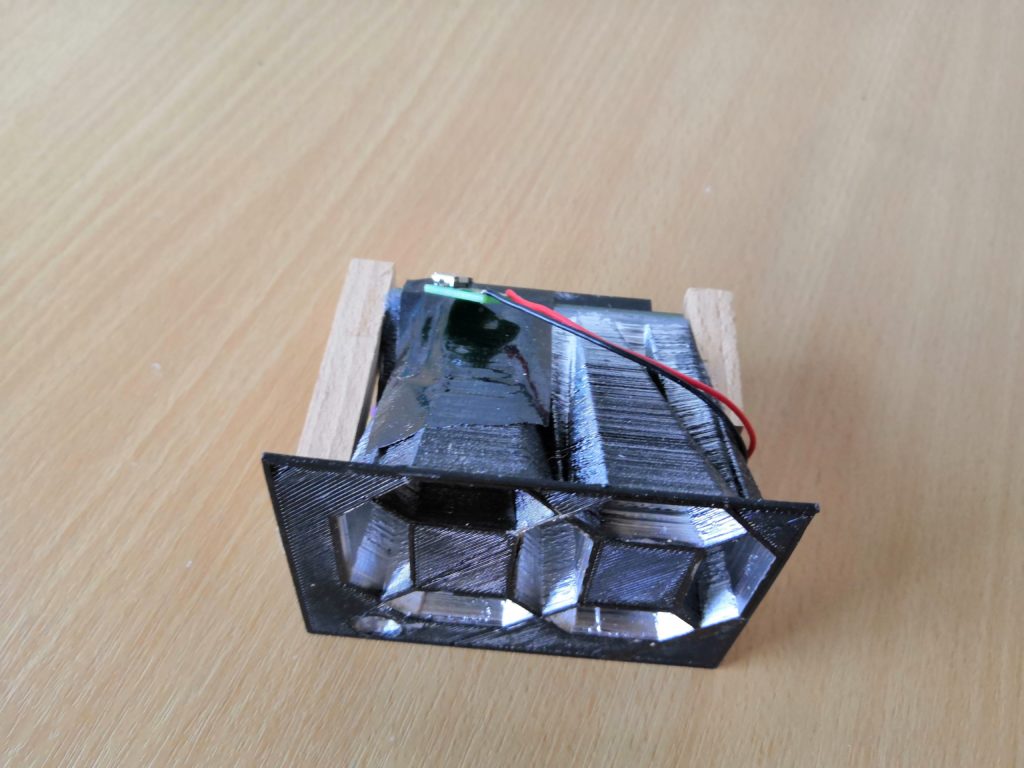
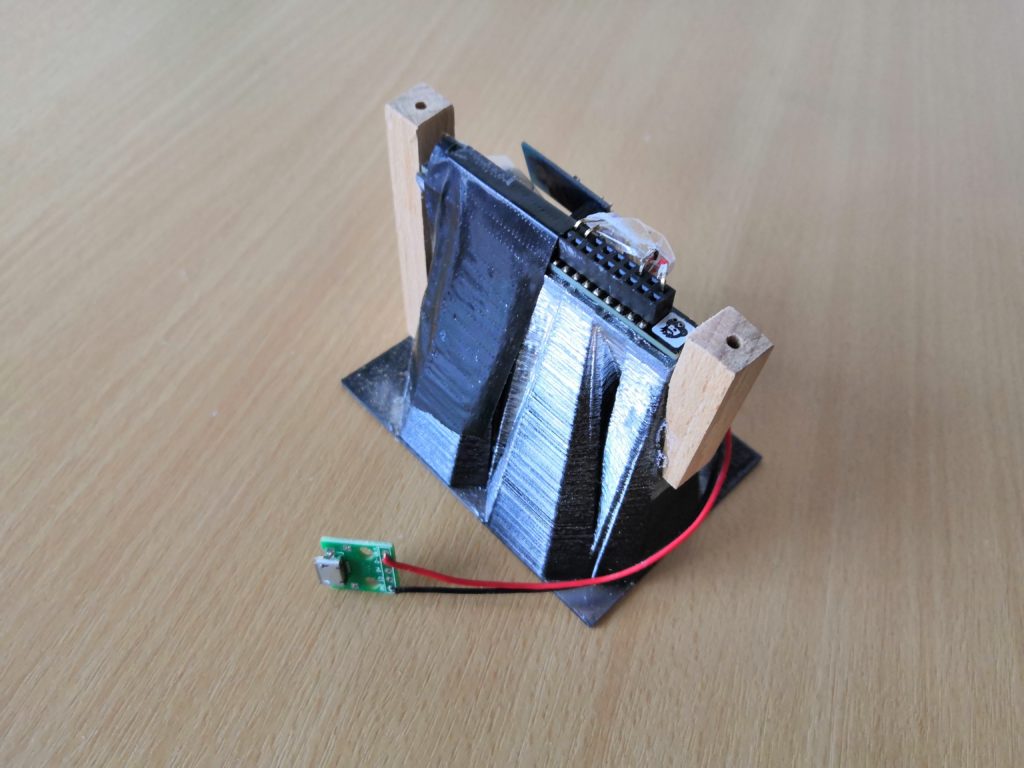
Wooden housing
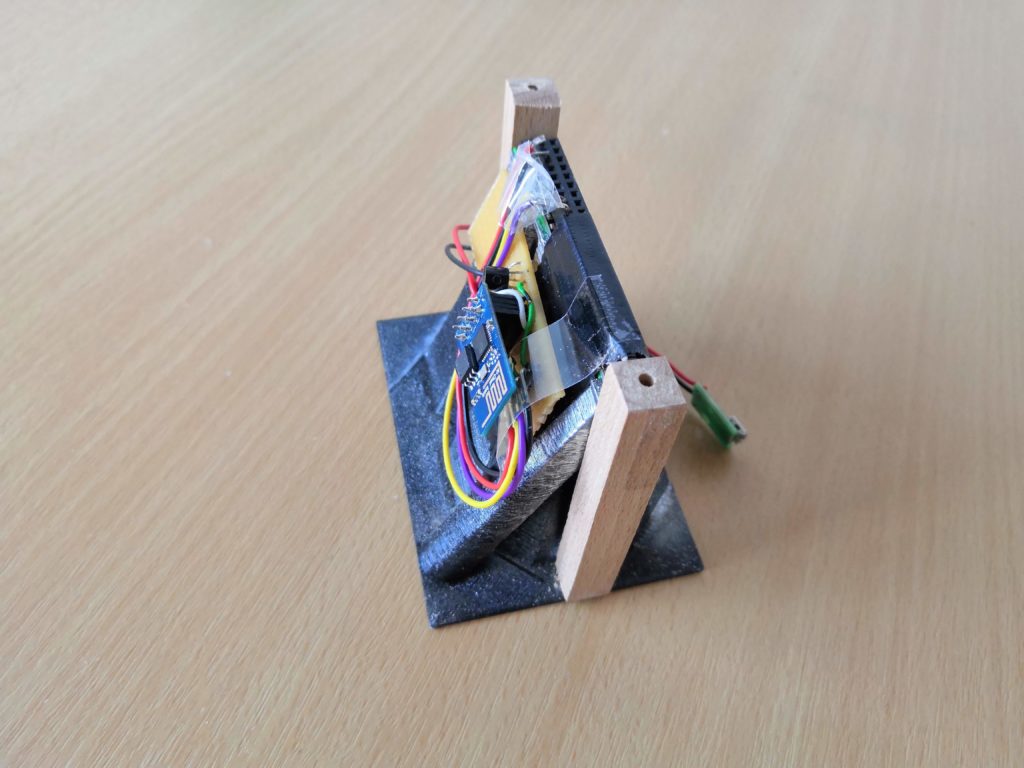
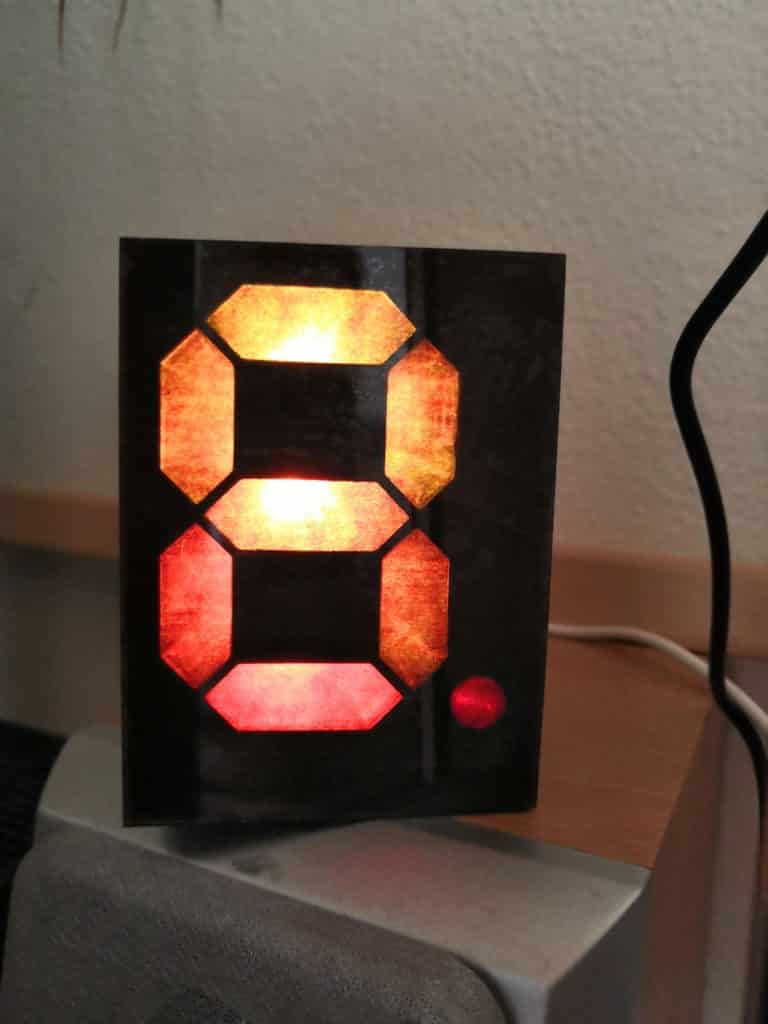
For the housing, I used some plywood and build a triangle-shaped box. Here you see some impressions of the building process. The cover glass is a 2mm thick plexiglass with a brown semitransparent paper behind it. Because of the dark colour, the single segments are not visible in the turned-off state.
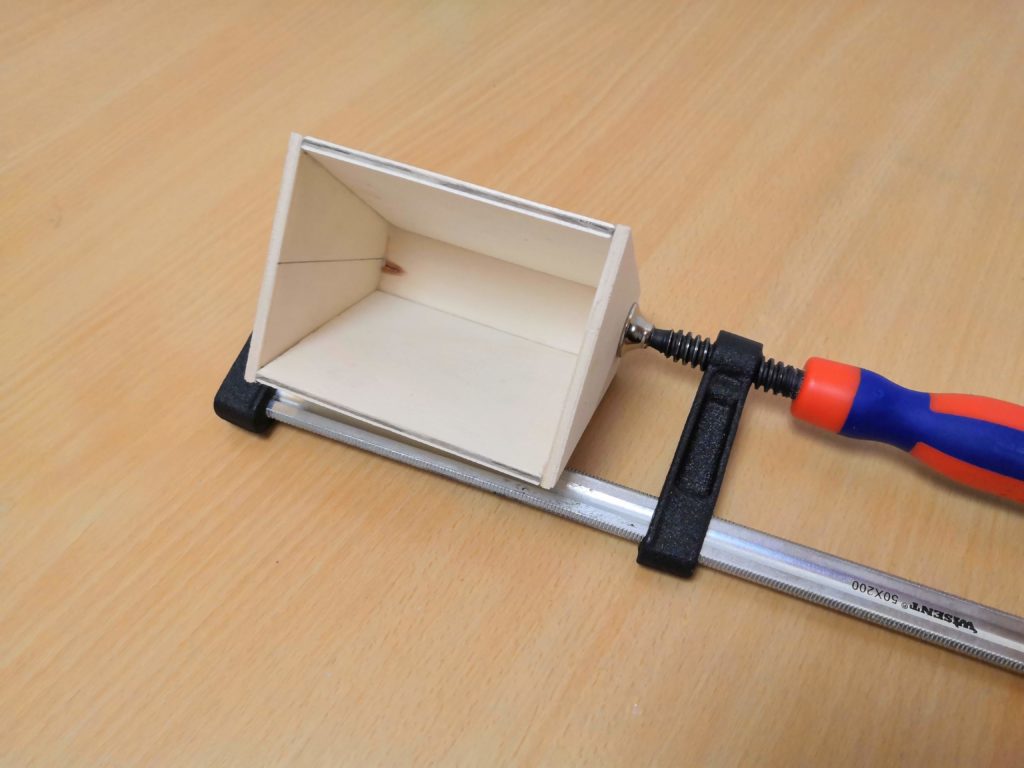
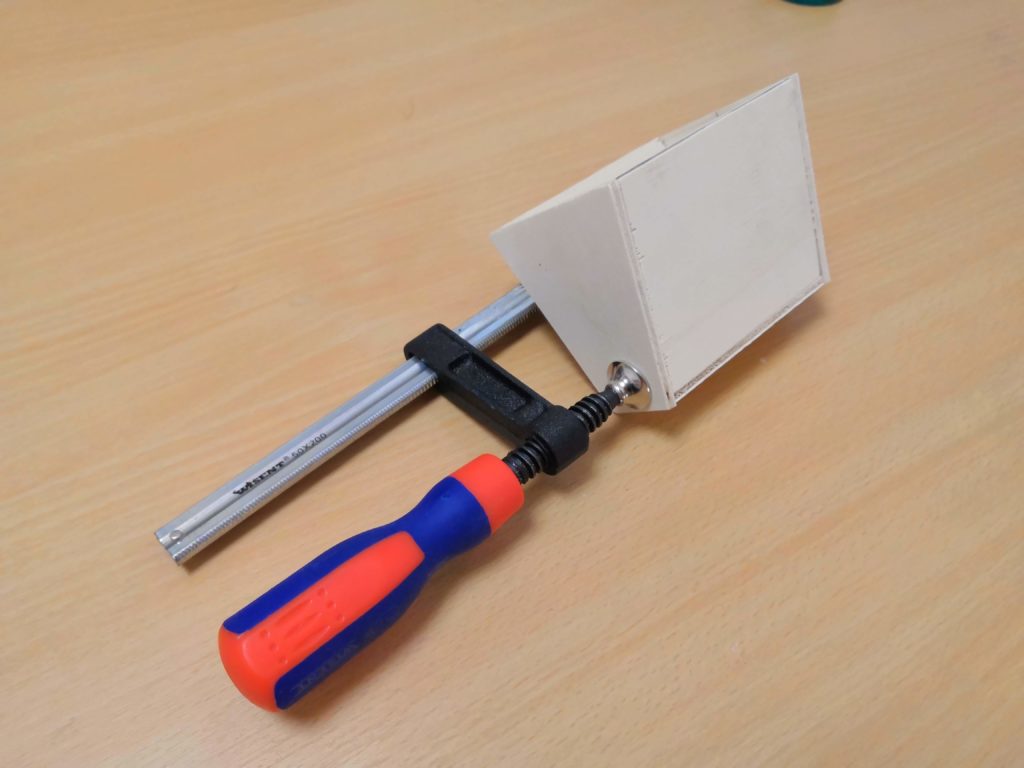
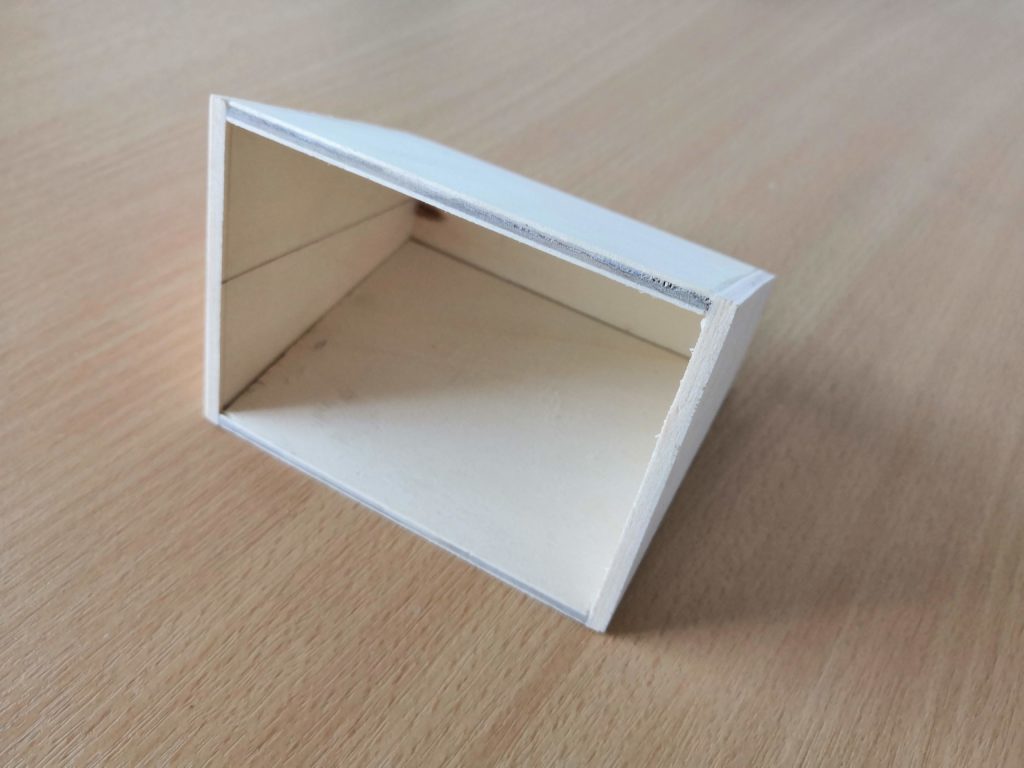
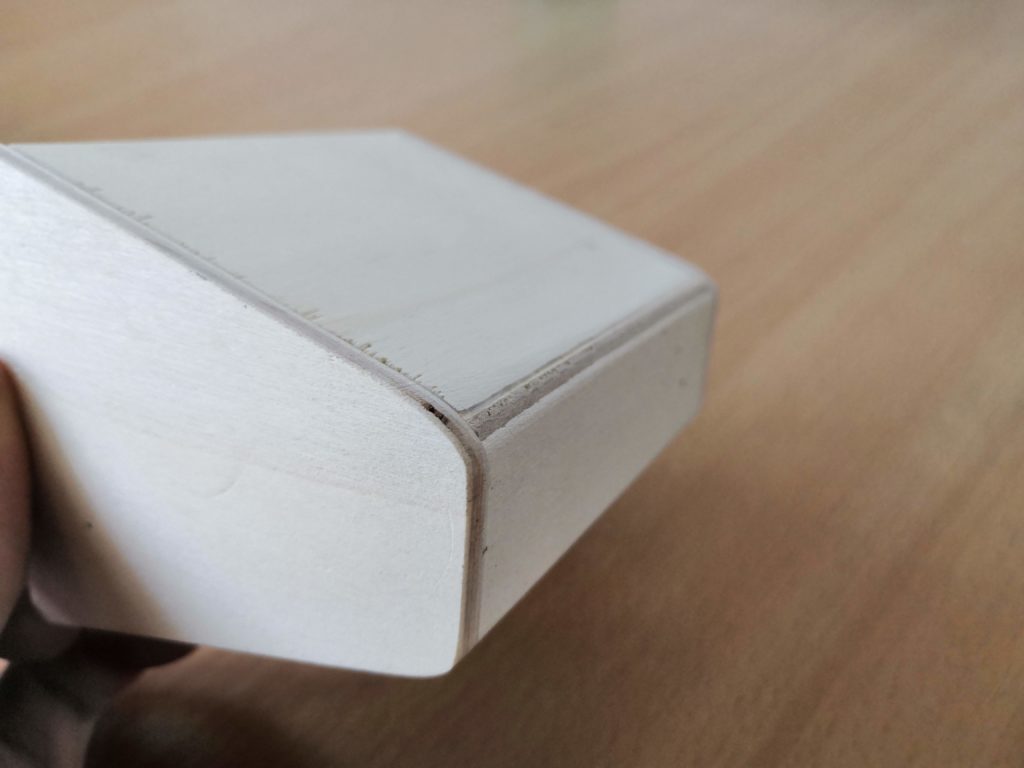
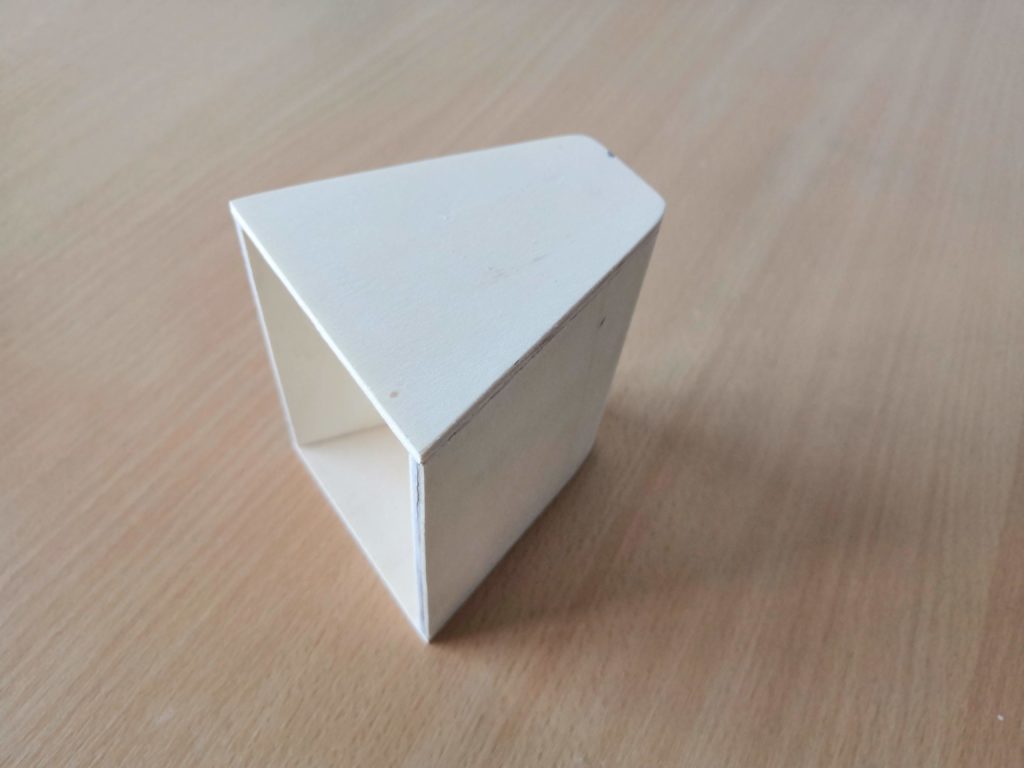
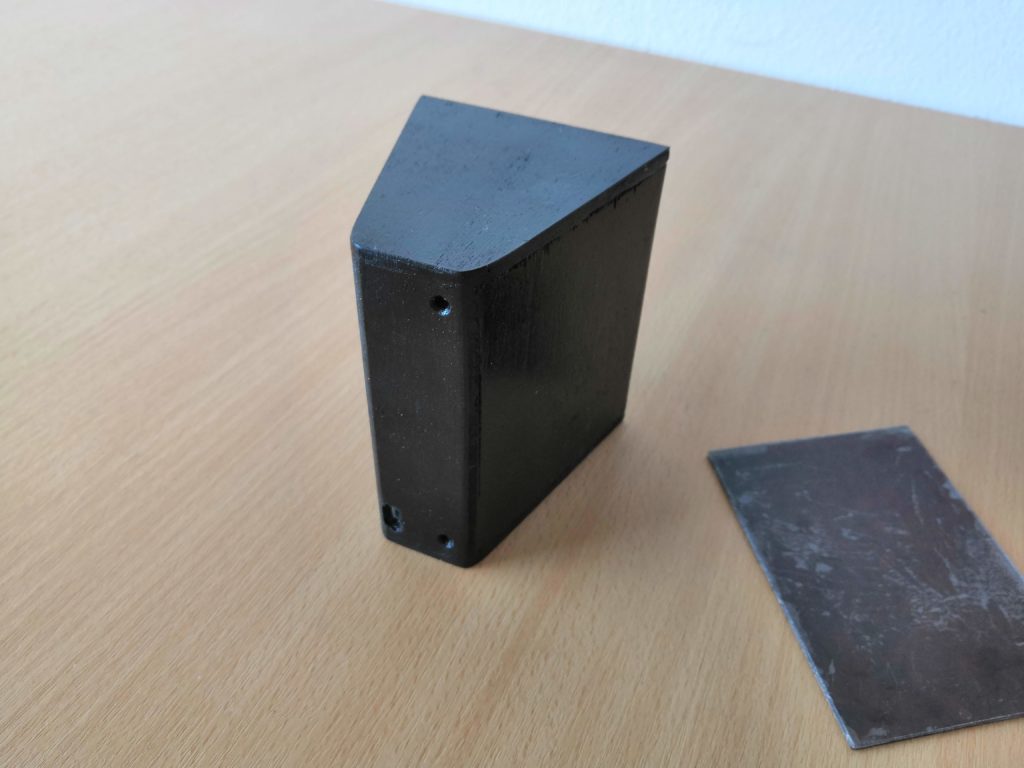
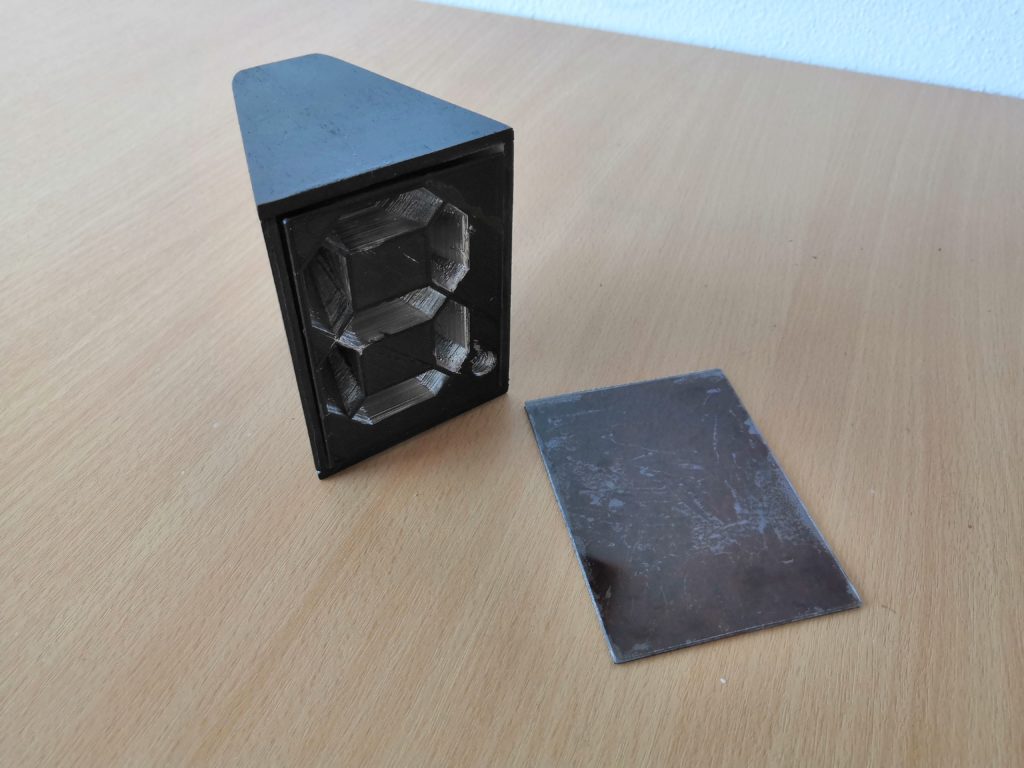
Electronics
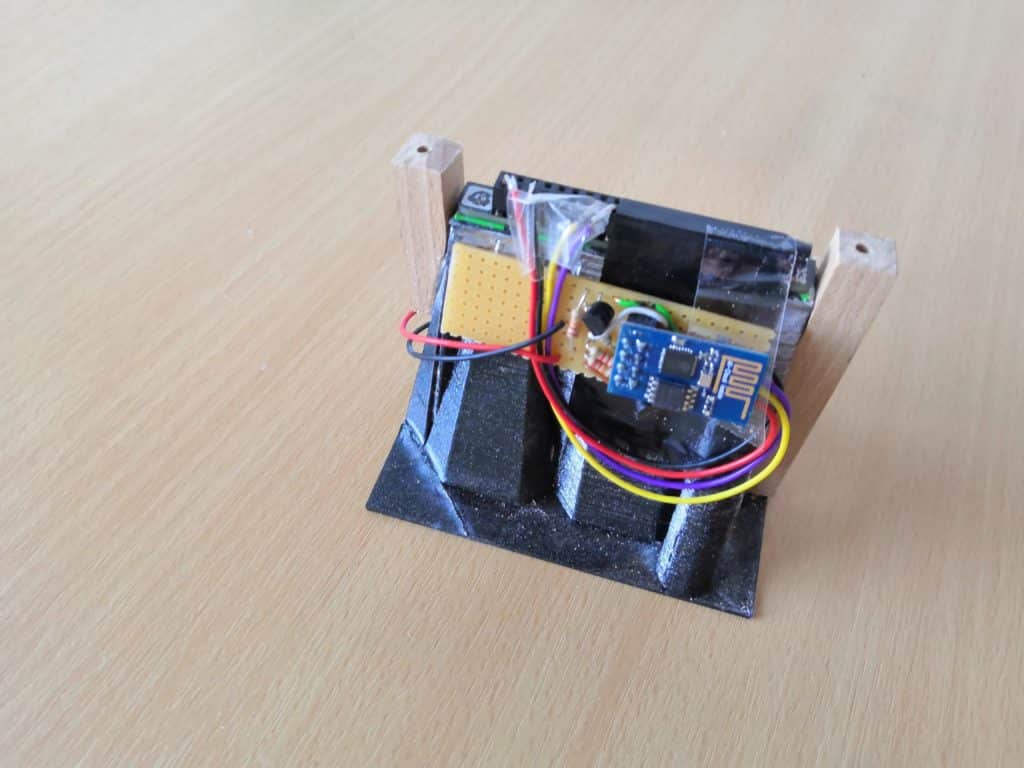
The electronic part is not complicated. As a microcontroller, I use an ESP8266, which provides a WiFi interface so that I change the code via OTA (Over-The-Air) without opening the lamp again. I can also retrieve the information I want to display from an external source (e.g. a webserver). See more about the use cases in chapter Software.

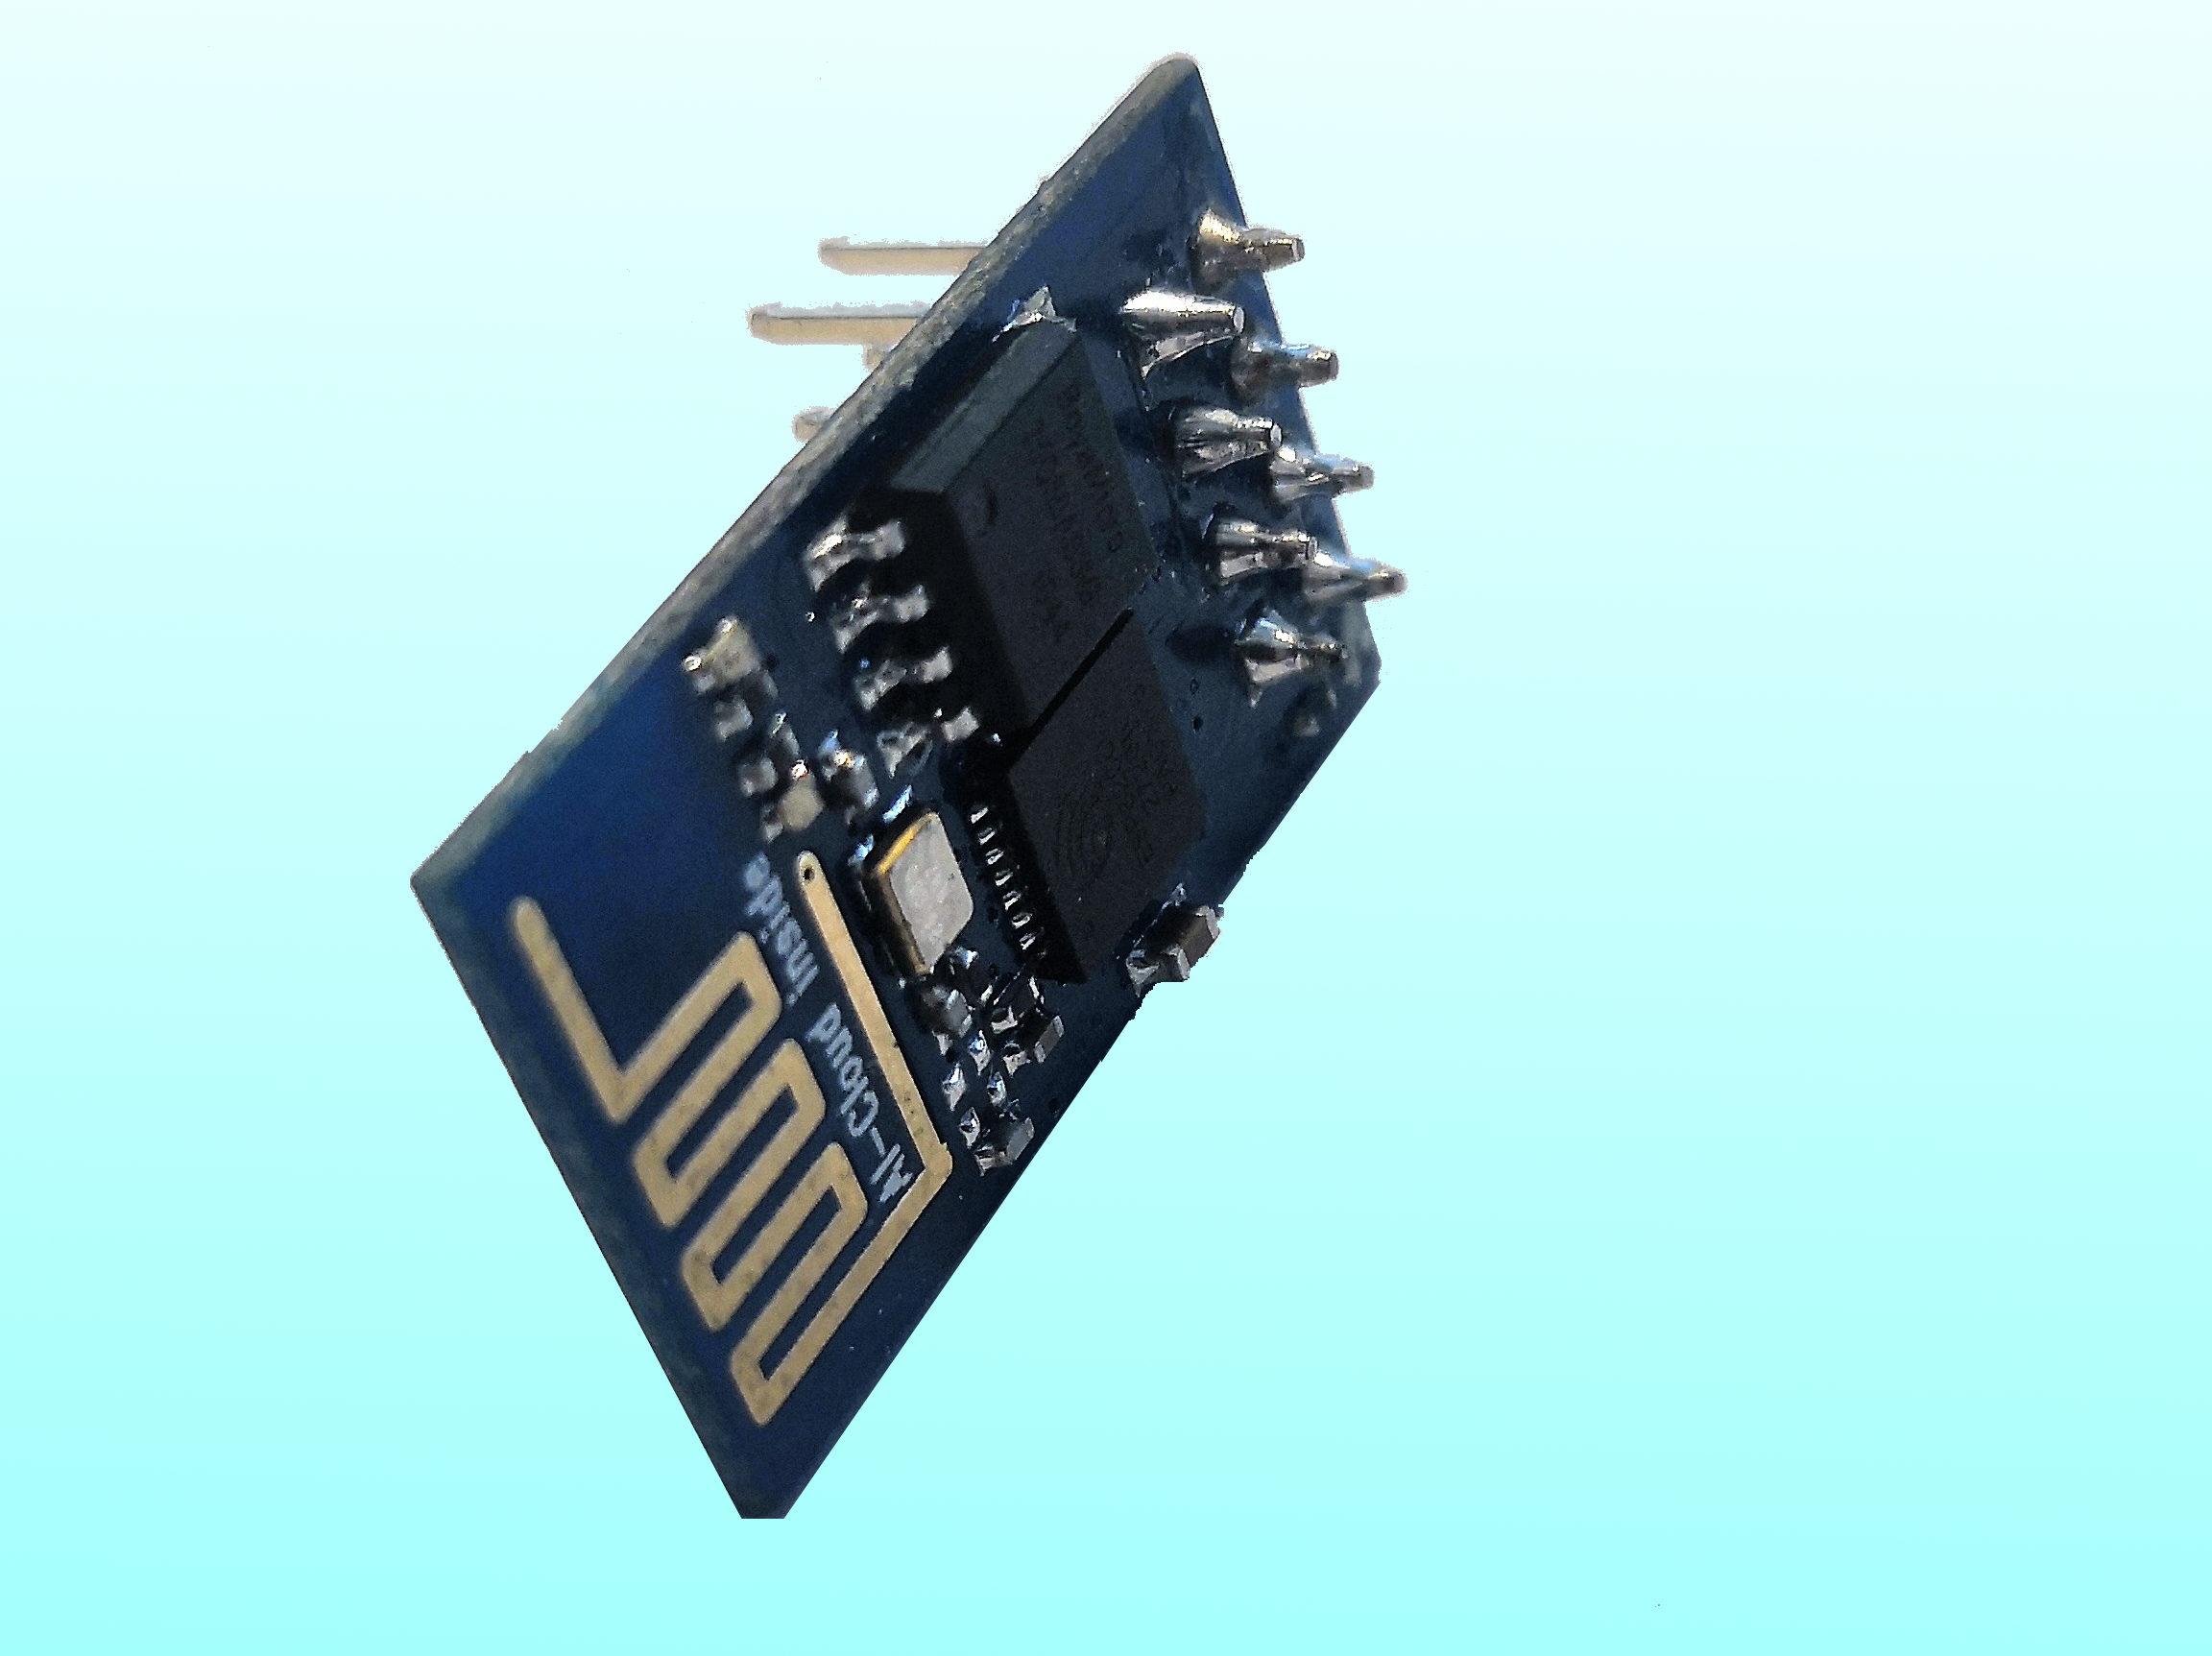
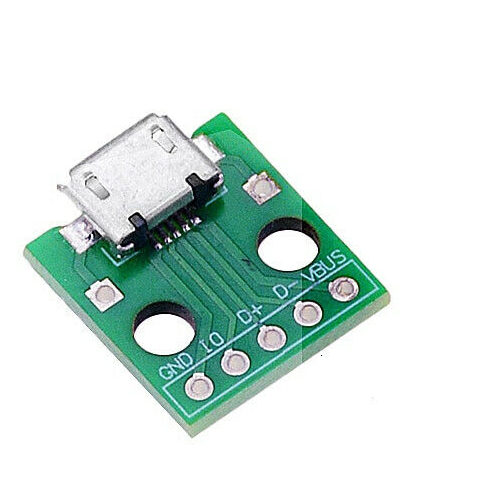
As mentioned in the beginning I use a Raspberry Pi Blink! the module as a light source. This module contains eight LEDs with the APA102 RGB LED controller IC so that all LEDs can easily be controlled individually via a two-wire bus, so only two pins of the ESP8266 are used (data and clock pin). Combined with some other small electronic components like voltage regulator (ESP8266 uses 3.3V), resistors and transistors the final schematic looks like this:
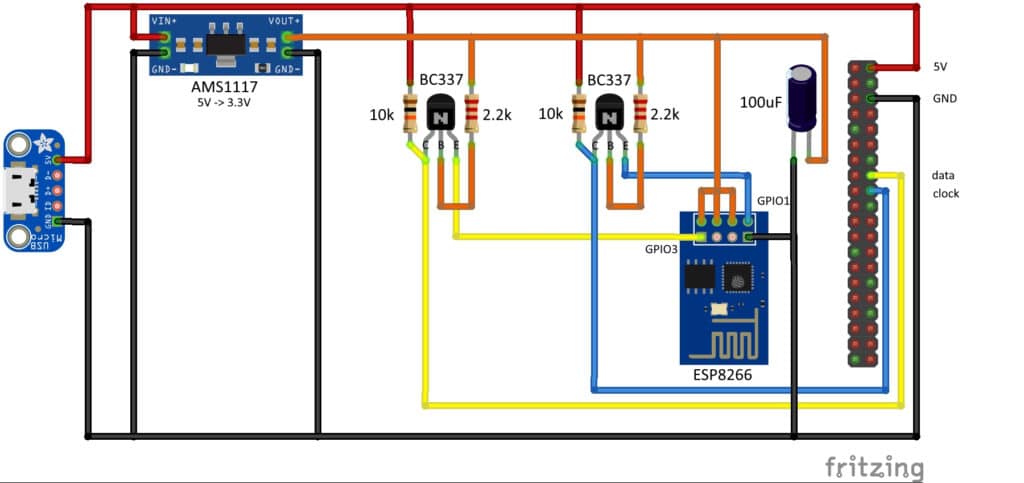
I use the NPN transistors for a self-build level shifter to align the 3.3V logic level of ESP8266 with the required 5V logic level of the LEDs.
Software
As already mentioned there are many use cases that can be implemented with the lamp. I will present two different ones:
- Countdown from 9 to 0 in a loop
- Display a number provided via an external webserver
All use cases have in common to use the ArduinoOTA to upload new software without opening the box again.
I am using the Arduino IDE to program the ESP8266. Please find detailed instructions on how to program an ESP8266 in my How-To post about this topic. In the following I have listed the full source code for both use cases:
Sourcecode for the countdown use case
#include <ESP8266WiFi.h>
#include <ArduinoOTA.h>
#include <APA102.h>
#define STASSID "MY_WIFI_SSID"
#define STAPSK  "**********"
// Define which pins to use.
const uint8_t dataPin = 3;
const uint8_t clockPin = 1;
// Create an object for writing to the LED strip.
APA102<dataPin, clockPin> ledStrip;
// Set the number of LEDs to control.
const uint16_t ledCount = 8;
// Create a buffer for holding the colors (3 bytes per color).
rgb_color *mycolors;
// Set the brightness to use (the maximum is 31).
const uint8_t brightness = 30;
// will store last time LED was updated
unsigned long previousMillis1 = millis();
unsigned long previousMillis2 = millis();
uint8_t currentCounter = 9;
uint16_t currentHue = 0;
rgb_color * writeNumber(uint8_t n, uint8_t p, rgb_color c);
void setup()
{
  delay(1000);
  WiFi.mode(WIFI_STA);
  WiFi.begin(STASSID, STAPSK);
  while (WiFi.waitForConnectResult() != WL_CONNECTED) {
    // Connection Failed! Rebooting..."
    ESP.restart();
  }
  ArduinoOTA.begin();
}
void loop()
{
  ArduinoOTA.handle();
  // Countdown every second
  if(millis() - previousMillis1 > 1000){
    previousMillis1 = millis();
    rgb_color color = hsvToRgb(currentHue, 255, 255);
    mycolors = writeNumber(currentCounter, 0, color);
    ledStrip.write(mycolors, ledCount, brightness);
    if(currentCounter == 0){
      currentCounter = 9;
    }
    else{
      currentCounter--;
    }
  }
  // Change the color every 100 milliseconds
  // (will only be display on next countdown trigger)
  if(millis() - previousMillis2 > 100){
    previousMillis2 = millis();

    currentHue++;
    if(currentHue == 256){
      currentHue = 0;
    }
  }
}
/*
 * Write given number to 7-segement
 * n is the number to display
 * p is wether point should be shown
 * c is the color to display
 */
rgb_color * writeNumber(uint8_t n, uint8_t p, rgb_color c){
  static rgb_color colors[ledCount];
  colors[7] =  p > 0 ? c: rgb_color(0, 0, 0);
  switch(n){
    case 0:
      colors[0] = c;
      colors[1] = c;
      colors[2] = c;
      colors[3] = rgb_color(0,0,0);
      colors[4] = c;
      colors[5] = c;
      colors[6] = c;
      break;
    case 1:
      colors[0] = rgb_color(0,0,0);
      colors[1] = c;
      colors[2] = rgb_color(0,0,0);
      colors[3] = rgb_color(0,0,0);
      colors[4] = c;
      colors[5] = rgb_color(0,0,0);
      colors[6] = rgb_color(0,0,0);
      break;
    case 2:
      colors[0] = c;
      colors[1] = c;
      colors[2] = rgb_color(0,0,0);
      colors[3] = c;
      colors[4] = rgb_color(0,0,0);
      colors[5] = c;
      colors[6] = c;
      break;
    case 3:
      colors[0] = c;
      colors[1] = c;
      colors[2] = rgb_color(0,0,0);
      colors[3] = c;
      colors[4] = c;
      colors[5] = rgb_color(0,0,0);
      colors[6] = c;
      break;
    case 4:
      colors[0] = rgb_color(0,0,0);
      colors[1] = c;
      colors[2] = c;
      colors[3] = c;
      colors[4] = c;
      colors[5] = rgb_color(0,0,0);
      colors[6] = rgb_color(0,0,0);
      break;
    case 5:
      colors[0] = c;
      colors[1] = rgb_color(0,0,0);
      colors[2] = c;
      colors[3] = c;
      colors[4] = c;
      colors[5] = rgb_color(0,0,0);
      colors[6] = c;
      break;
    case 6:
      colors[0] = c;
      colors[1] = rgb_color(0,0,0);
      colors[2] = c;
      colors[3] = c;
      colors[4] = c;
      colors[5] = c;
      colors[6] = c;
      break;
    case 7:
      colors[0] = c;
      colors[1] = c;
      colors[2] = rgb_color(0,0,0);
      colors[3] = rgb_color(0,0,0);
      colors[4] = c;
      colors[5] = rgb_color(0,0,0);
      colors[6] = rgb_color(0,0,0);
      break;
   case 8:
      colors[0] = c;
      colors[1] = c;
      colors[2] = c;
      colors[3] = c;
      colors[4] = c;
      colors[5] = c;
      colors[6] = c;
      break;
   case 9:
      colors[0] = c;
      colors[1] = c;
      colors[2] = c;
      colors[3] = c;
      colors[4] = c;
      colors[5] = rgb_color(0,0,0);
      colors[6] = c;
      break;
  }
  return colors;
}
/*
 * Converts a color from HSV to RGB.
 * h is hue, as a number between 0 and 360.
 * s is the saturation, as a number between 0 and 255.
 * v is the value, as a number between 0 and 255.
 */
rgb_color hsvToRgb(uint16_t h, uint8_t s, uint8_t v)
{
    uint8_t f = (h % 60)*255/60;
    uint8_t p = (255-s)*(uint16_t)v/255;
    uint8_t q = (255-f*(uint16_t)s/255)*(uint16_t)v/255;
    uint8_t t = (255-(255-f)*(uint16_t)s/255)*(uint16_t)v/255;
    uint8_t r = 0, g = 0, b = 0;
    switch((h / 60) % 6){
        case 0: r = v; g = t; b = p; break;
        case 1: r = q; g = v; b = p; break;
        case 2: r = p; g = v; b = t; break;
        case 3: r = p; g = q; b = v; break;
        case 4: r = t; g = p; b = v; break;
        case 5: r = v; g = p; b = q; break;
    }
    return rgb_color(r, g, b);
}
Source code for the webserver display use case
#include <ESP8266WiFi.h>
#include <ArduinoOTA.h>
#include <APA102.h>
#include <ESP8266HTTPClient.h>
#include <WiFiClient.h>
#define STASSID "MY_WIFI_SSID"
#define STAPSK  "**********"
// Define which pins to use.
const uint8_t dataPin = 3;
const uint8_t clockPin = 1;
// Create an object for writing to the LED strip.
APA102<dataPin, clockPin> ledStrip;
// Set the number of LEDs to control.
const uint16_t ledCount = 8;
// Create a buffer for holding the colors (3 bytes per color).
rgb_color *mycolors;
// Set the brightness to use (the maximum is 31).
const uint8_t brightness = 30;
// will store last time LED was updated
unsigned long previousMillis1 = millis();
unsigned long previousMillis2 = millis();
uint16_t currentHue = 0;
WiFiClient wifiClient;
rgb_color * writeNumber(uint8_t n, uint8_t p, rgb_color c);
void setup()
{
  delay(1000);
  WiFi.mode(WIFI_STA);
  WiFi.begin(STASSID, STAPSK);
  while (WiFi.waitForConnectResult() != WL_CONNECTED) {
    // Connection Failed! Rebooting..."
    ESP.restart();
  }
  ArduinoOTA.begin();
}
void loop()
{
  ArduinoOTA.handle();
  // Request number from webserver every 5 seconds
  if(millis() - previousMillis1 > 5000){
    previousMillis1 = millis();
    //Check WiFi connection status
    uint8_t value = 0;
    if (WiFi.status() == WL_CONNECTED) {
      //Declare an object of class HTTPClient
      HTTPClient http;
      //Specify request destination
      http.begin(wifiClient,"http://192.168.0.100:8235/");
      //Send the request
      int httpCode = http.GET();
      //Check the returning code
      if (httpCode > 0) {
        //Get the request response payload
        String payload = http.getString();
        value = payload.toInt() % 10;
      }
      http.end();   //Close connection
    }
    rgb_color color = hsvToRgb(currentHue, 255, 255);
    mycolors = writeNumber(value, 0, color);
    ledStrip.write(mycolors, ledCount, brightness);
  }
  // Change the color every 100 milliseconds
  // (will only be display after next request)
  if(millis() - previousMillis2 > 100){
    previousMillis2 = millis();

    currentHue++;
    if(currentHue == 256){
      currentHue = 0;
    }
  }
}
/*
 * Write given number to 7-segement
 * n is the number to display
 * p is wether point should be shown
 * c is the color to display
 */
rgb_color * writeNumber(uint8_t n, uint8_t p, rgb_color c){
  static rgb_color colors[ledCount];
  colors[7] =  p > 0 ? c: rgb_color(0, 0, 0);
  switch(n){
    case 0:
      colors[0] = c;
      colors[1] = c;
      colors[2] = c;
      colors[3] = rgb_color(0,0,0);
      colors[4] = c;
      colors[5] = c;
      colors[6] = c;
      break;
    case 1:
      colors[0] = rgb_color(0,0,0);
      colors[1] = c;
      colors[2] = rgb_color(0,0,0);
      colors[3] = rgb_color(0,0,0);
      colors[4] = c;
      colors[5] = rgb_color(0,0,0);
      colors[6] = rgb_color(0,0,0);
      break;
    case 2:
      colors[0] = c;
      colors[1] = c;
      colors[2] = rgb_color(0,0,0);
      colors[3] = c;
      colors[4] = rgb_color(0,0,0);
      colors[5] = c;
      colors[6] = c;
      break;
    case 3:
      colors[0] = c;
      colors[1] = c;
      colors[2] = rgb_color(0,0,0);
      colors[3] = c;
      colors[4] = c;
      colors[5] = rgb_color(0,0,0);
      colors[6] = c;
      break;
    case 4:
      colors[0] = rgb_color(0,0,0);
      colors[1] = c;
      colors[2] = c;
      colors[3] = c;
      colors[4] = c;
      colors[5] = rgb_color(0,0,0);
      colors[6] = rgb_color(0,0,0);
      break;
    case 5:
      colors[0] = c;
      colors[1] = rgb_color(0,0,0);
      colors[2] = c;
      colors[3] = c;
      colors[4] = c;
      colors[5] = rgb_color(0,0,0);
      colors[6] = c;
      break;
    case 6:
      colors[0] = c;
      colors[1] = rgb_color(0,0,0);
      colors[2] = c;
      colors[3] = c;
      colors[4] = c;
      colors[5] = c;
      colors[6] = c;
      break;
    case 7:
      colors[0] = c;
      colors[1] = c;
      colors[2] = rgb_color(0,0,0);
      colors[3] = rgb_color(0,0,0);
      colors[4] = c;
      colors[5] = rgb_color(0,0,0);
      colors[6] = rgb_color(0,0,0);
      break;
   case 8:
      colors[0] = c;
      colors[1] = c;
      colors[2] = c;
      colors[3] = c;
      colors[4] = c;
      colors[5] = c;
      colors[6] = c;
      break;
   case 9:
      colors[0] = c;
      colors[1] = c;
      colors[2] = c;
      colors[3] = c;
      colors[4] = c;
      colors[5] = rgb_color(0,0,0);
      colors[6] = c;
      break;
  }
  return colors;
}
/*
 * Converts a color from HSV to RGB.
 * h is hue, as a number between 0 and 360.
 * s is the saturation, as a number between 0 and 255.
 * v is the value, as a number between 0 and 255.
 */
rgb_color hsvToRgb(uint16_t h, uint8_t s, uint8_t v)
{
    uint8_t f = (h % 60)*255/60;
    uint8_t p = (255-s)*(uint16_t)v/255;
    uint8_t q = (255-f*(uint16_t)s/255)*(uint16_t)v/255;
    uint8_t t = (255-(255-f)*(uint16_t)s/255)*(uint16_t)v/255;
    uint8_t r = 0, g = 0, b = 0;
    switch((h / 60) % 6){
        case 0: r = v; g = t; b = p; break;
        case 1: r = q; g = v; b = p; break;
        case 2: r = p; g = v; b = t; break;
        case 3: r = p; g = q; b = v; break;
        case 4: r = t; g = p; b = v; break;
        case 5: r = v; g = p; b = q; break;
    }
    return rgb_color(r, g, b);
}
0 Comments